How to Have More Focused
Here are a few of our primary fashion blog categories.

Human News Love Beanie
Human News Love Beanie

Here are a few of our primary fashion blog categories.

Here are a few of our primary fashion blog categories.

Here are a few of our primary fashion blog categories.

Frozen crab legs are a delicious seafood delicacy that can elevate your home dining experience. Whether you’re a seafood enthusiast or just looking to try something new, cooking frozen crab legs is a straightforward process that yields mouthwatering results. In this comprehensive guide, we’ll walk you through step-by-step instructions on how to cook frozen crab legs to perfection.
1. Gather Your Ingredients and Tools
Before you begin, make sure you have everything you need:

2. Thawing the Crab Legs (Optional)
While it’s possible to cook frozen crab legs directly, thawing them can make the cooking process more even. Here are two methods for thawing:
3. Preparing the Pot
Fill the large pot with enough water to cover the crab legs completely. Add a generous pinch of salt to the water, which enhances the flavor of the crab meat. Bring the water to a rolling boil.
4. Cooking the Crab Legs
Once the water is boiling, carefully place the crab legs into the pot. Be cautious not to overcrowd the pot; you may need to cook them in batches if you have a large quantity.
5. Simmer and Steam
Reduce the heat to a gentle simmer, cover the pot with a lid, and let the crab legs cook for about 4-5 minutes for smaller legs and 6-8 minutes for larger ones. This gentle simmering will steam the crab legs to perfection.

6. Drain and Serve
Using tongs, remove the cooked crab legs from the pot and drain them thoroughly. You can serve them immediately or keep them warm while you prepare any accompanying sauces or sides.
7. Serving Suggestions
Now that you know how to cook frozen crab legs like a pro, you’re ready to indulge in this delectable seafood treat in the comfort of your own home. Whether it’s a special occasion or a weeknight dinner, your culinary skills will shine as you savor the sweet and tender crab meat.
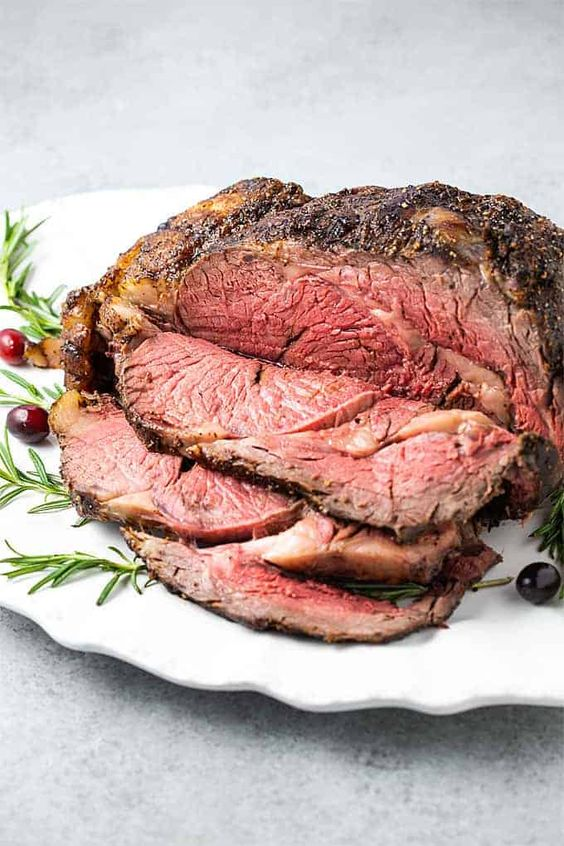
The eye of round roast is a lean and flavorful cut of beef that, when cooked correctly, can result in a delicious and tender meal. Whether you’re hosting a special dinner or just looking to prepare a hearty roast for your family, this comprehensive guide will walk you through the step-by-step process of how to cook an eye of round roast to perfection.
1. Choosing the Right Roast
Before you begin, it’s essential to choose a high-quality eye of round roast. Look for a roast that has a uniform shape and minimal fat on the exterior. A roast weighing between 2 to 4 pounds is ideal for most family-sized meals.
2. Preparing the Roast
Ingredients:
Instructions:

3. Seasoning the Roast
Ingredients:
Instructions:
4. Searing the Roast (Optional)
Searing the roast can enhance flavor and create a lovely crust. Heat a heavy skillet over high heat, add a bit of oil, and sear the roast on all sides until it develops a nice brown crust. This step is optional but highly recommended for added flavor.
5. Roasting the Eye of Round
Ingredients:
Instructions:
6. Resting the Roast
After removing the roast from the oven, tent it loosely with aluminum foil and allow it to rest for about 15-20 minutes. This resting period allows the juices to redistribute, resulting in a juicier and more tender roast.

7. Slicing and Serving
Slice the eye of round roast thinly against the grain to maximize tenderness. Serve it with your favorite sides, such as roasted vegetables, mashed potatoes, or a fresh salad.
8. Au Jus or Gravy (Optional)
For added flavor, you can make a simple au jus or gravy using the pan drippings. Deglaze the roasting pan with a bit of red wine or beef broth, then thicken the liquid with a roux (butter and flour mixture) to create a savory sauce.
With this comprehensive guide on how to cook an eye of round roast, you’re well-equipped to create a mouthwatering and impressive meal. Whether it’s a holiday feast or a Sunday dinner, your guests or family will appreciate your culinary expertise as they savor each tender and flavorful slice of roast beef.
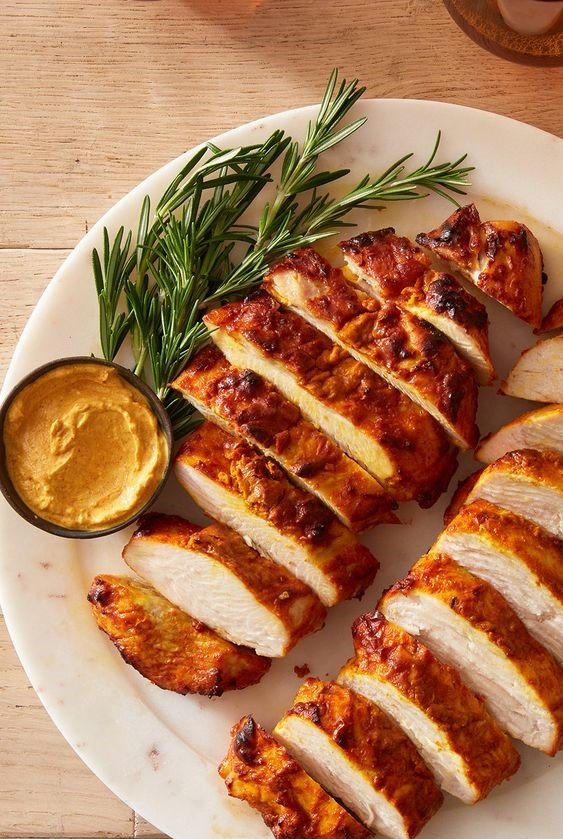
Air fryers have become a kitchen favorite for their ability to produce crispy and delicious dishes with less oil. When it comes to cooking thin chicken breasts, the air fryer is a game-changer, ensuring your poultry turns out juicy on the inside and delightfully crispy on the outside. In this guide, we’ll walk you through how long to cook thin chicken breast in an air fryer, ensuring you achieve culinary success every time.
1. Preparation is Key
Before you start cooking, make sure your thin chicken breasts are properly prepared:

2. Preheat the Air Fryer
Preheating your air fryer is crucial for even cooking and achieving that perfect crispy texture. Set the air fryer to the desired temperature before adding the chicken. For thin chicken breasts, a temperature of 375°F (190°C) is recommended.
3. Cooking Time
The cooking time for thin chicken breasts in an air fryer varies depending on their thickness. Here’s a general guideline:
4. Flip for Even Cooking
To ensure both sides of the chicken breasts cook evenly and develop that desired crispiness, flip them halfway through the cooking time. Use tongs or a spatula to gently turn the chicken over.
5. Check for Doneness
The best way to determine if your thin chicken breasts are done is to use a meat thermometer. The internal temperature should reach 165°F (74°C). Insert the thermometer into the thickest part of the chicken breast to get an accurate reading.

6. Rest Before Serving
Once your thin chicken breasts reach the desired internal temperature, remove them from the air fryer and allow them to rest for a few minutes. This resting period helps retain their juices and ensures a tender bite.
7. Serving Suggestions
Thin chicken breasts cooked in the air fryer are incredibly versatile and can be served in various ways:
Cooking thin chicken breasts in an air fryer is a quick and convenient way to achieve a delicious and healthy meal. With the right preparation and cooking time, you’ll have tender, juicy, and crispy chicken that’s sure to satisfy your taste buds. Experiment with different seasonings and sauces to create a variety of flavor profiles to suit your preferences.
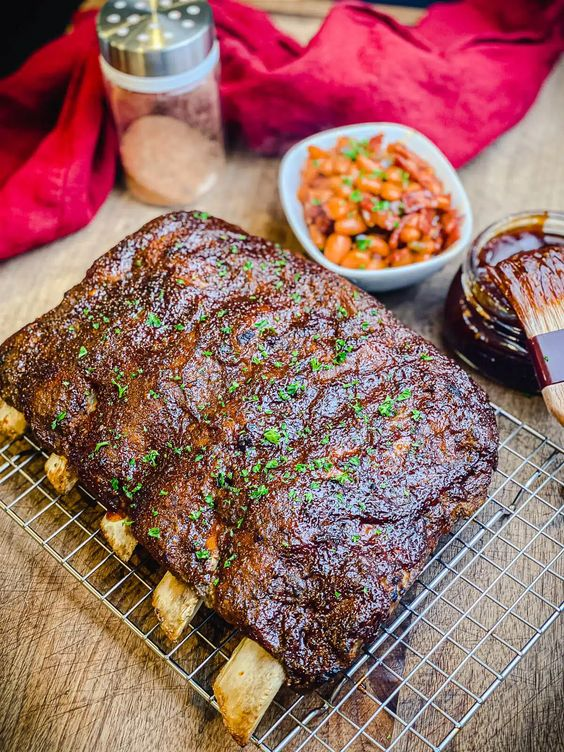
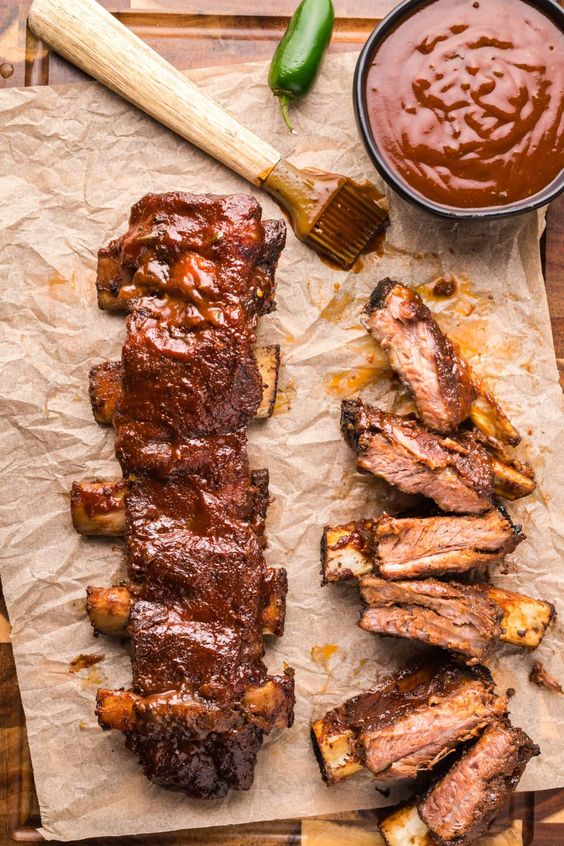
Cooking ribs in the oven is a fantastic way to achieve tender, flavorful, and succulent meat without the need for outdoor grilling or a smoker. Whether you’re a seasoned pitmaster or a beginner in the world of rib preparation, knowing how long to cook ribs in the oven at 350°F is essential for a delicious result. In this guide, we’ll take you through the steps to perfect oven-baked ribs.
1. Ingredients and Equipment
Before you begin, gather the necessary ingredients and equipment:
Ingredients:
Equipment:
2. Preparing the Ribs
Rinse and Pat Dry: Start by rinsing the ribs under cold water and patting them dry with paper towels. This helps remove any bone fragments and ensures the rub adheres properly.
Remove the Membrane (Optional): On the bone side of the ribs, you may find a thin membrane. Removing it can help the seasonings penetrate the meat better. Use a butter knife or your fingers to loosen a corner of the membrane, then grip it with a paper towel and pull it off in one piece.
Season the Ribs: Generously season the ribs with your chosen dry rub or seasoning. This can be a store-bought mix or a homemade blend of herbs and spices. Make sure to rub the seasoning evenly on both sides of the ribs.
3. Preheat the Oven
Preheat your oven to 350°F (175°C). It’s important to have a fully preheated oven to ensure even cooking.
4. Wrapping the Ribs
Place the seasoned ribs on a large piece of heavy-duty aluminum foil. If the ribs are too long for one piece of foil, you can use two overlapping pieces to create a larger cooking surface.
5. Slow Baking Method
To achieve tender and juicy ribs, you’ll use a slow-baking method. Wrap the ribs tightly in the foil, creating a sealed packet. Ensure there are no gaps for steam to escape. This will help the ribs cook in their juices, enhancing flavor and tenderness.
6. Cooking Time
The cooking time for ribs at 350°F depends on the type of ribs and their thickness:
Check for doneness by using a meat thermometer. The internal temperature of the ribs should reach around 190-203°F (88-95°C). When the meat easily pulls away from the bone, it’s a sign that your ribs are perfectly cooked.

7. Optional Glazing
For a final touch of flavor, you can glaze the ribs with your favorite barbecue sauce during the last 15-30 minutes of cooking. Simply open the foil packet, brush on the sauce, and return the ribs to the oven to caramelize the sauce.
8. Resting and Serving
Once your ribs are done, remove them from the oven and allow them to rest, still wrapped in foil, for about 10-15 minutes. This resting period allows the juices to redistribute, resulting in a juicier and more flavorful rib.
After resting, unwrap the ribs, slice them between the bones, and serve with your favorite side dishes.
Cooking ribs in the oven at 350°F is a convenient and delicious way to enjoy this classic barbecue favorite. With patience and a few simple steps, you’ll savor tender, flavorful ribs that are sure to impress your family and guests.
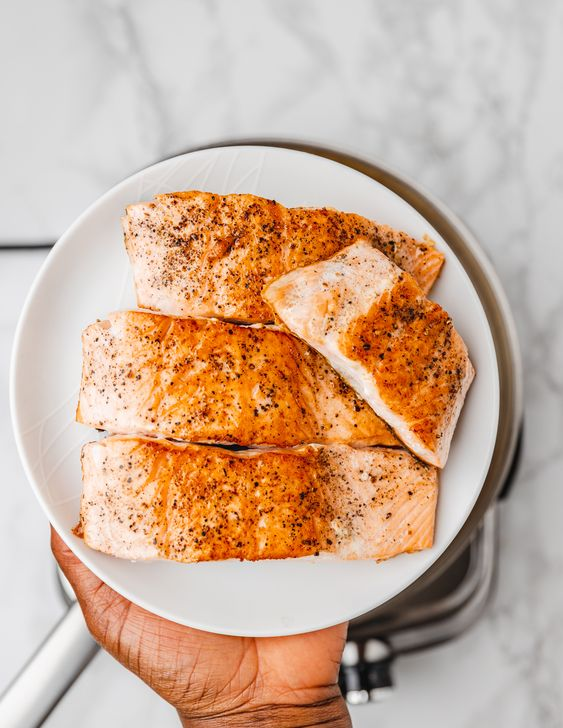
Salmon is a beloved and nutritious fish that graces the plates of many seafood enthusiasts. Whether you’ve prepared a succulent salmon fillet or a mouthwatering salmon steak, knowing how long cooked salmon remains safe and delicious is essential for enjoying this delectable seafood. In this guide, we’ll explore the shelf life of cooked salmon, proper storage techniques, and signs of spoilage.
1. Refrigeration is Key
Proper storage is vital to ensure that cooked salmon maintains its quality and safety. After cooking your salmon to perfection, allow it to cool to room temperature. Once cooled, transfer it to an airtight container or a zip-top bag, making sure to remove as much air as possible. This prevents the salmon from coming into contact with oxygen, which can cause it to deteriorate faster. Then, place the container in the refrigerator promptly.

2. Shelf Life in the Fridge
When stored correctly at a temperature of 40°F (4°C) or lower, cooked salmon can typically last for approximately 3 to 4 days. However, it’s crucial to keep an eye out for any signs of spoilage. If you notice an off-putting odor, unusual textures, or discoloration, it’s best to discard the salmon, as it may no longer be safe to eat.
3. Freezing for Long-Term Storage
If you need to extend the shelf life of your cooked salmon, consider freezing it. Wrap the salmon tightly in plastic wrap or aluminum foil or place it in a freezer-safe container. Properly frozen cooked salmon can maintain its quality for up to 2 to 3 months.
4. Safely Thawing Cooked Salmon
When you’re ready to use your frozen cooked salmon, it’s essential to thaw it safely. The best method is to transfer it to the refrigerator, allowing it to thaw gradually. Avoid thawing salmon at room temperature or in warm water, as this can promote bacterial growth.
5. Reheating Cooked Salmon
Reheating cooked salmon is a straightforward process. You can use a microwave, oven, or stovetop. Ensure that the salmon reaches an internal temperature of at least 145°F (63°C) to ensure it’s safe to eat. Once reheated, consume the salmon promptly and avoid leaving it out at room temperature.

6. Recognizing Signs of Spoilage
Even when stored correctly, cooked salmon can spoil. Keep an eye out for indicators such as a foul odor, slimy texture, or unusual discoloration. If any of these signs are present, it’s safer to discard the salmon to prevent potential foodborne illnesses.
7. Quality Considerations
Remember that the quality of cooked salmon may decline over time, even if it remains safe to eat. The texture may change, and the flavor may become less appealing. To enjoy the best culinary experience, aim to consume cooked salmon within the recommended storage timeframes.
Cooked salmon can stay good for a few days in the fridge and several months in the freezer when stored correctly. By following these storage and safety guidelines, you can confidently savor your salmon dishes without worrying about their shelf life.